Bird Sentry
When life moved indoors during the pandemic, I assumed remote work would at least mean fewer interruptions and more peace. Then a pigeon left an egg in one of our plant pots. I figured it wouldn’t cause trouble, but I guessed wrong. Our new tenant, "Paco," left mess everywhere, screeched nonstop, and when he finally flew off, his cousins turned our balcony into pigeon nightclub central. I tried tape, spikes, even a fake owl. Nothing lasted. In the end, I kept running outside with a spray bottle just to get a few minutes of quiet. Then it clicked: why not automate it? That’s when I built Bird Sentry.
Introduction
Bird Sentry scares off birds by spraying them with water. It uses a Raspberry Pi Zero 2 W to control a servo pan-tilt and aim the water from a pump. It includes a camera for detecting birds in real time, and you can control it remotely using the built-in WIFI. I had a lot of fun building the first version, so after a couple years I decided to do a second version with some improvements. These instructions cover the second version.
Components
- Raspberry Pi Zero 2 W
- Raspberry Pi Camera Module with Flex Cable
- WaveShare PWM Servo HAT
- Pan-Tilt Servo Mount
- MG996R Servo Motors (May come with pan-tilt kit)
- Vinyl Tubing
- Irrigation Spray Nozzle
- 12v Micro Brushless Water Pump
- 12v Relay Module
- DC-DC Buck Converter 12v to 5v 3a
- 12v Power Supply or 12v Rechargeable Battery
- Female Barrel Connector
- Jumper Wires
- Heat Shrink Tubing
- Zip Ties
- Weatherproof Enclosure
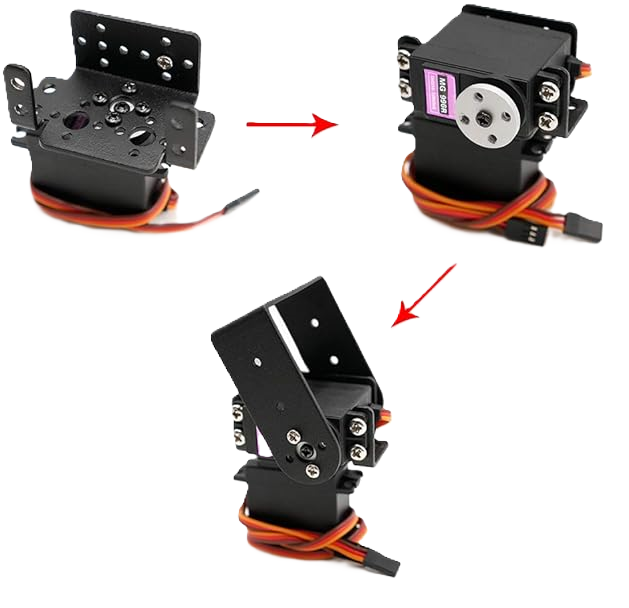
Pan-Tilt Servo Mount
The pan-tilt servo mount comes with a set of screws, gears and bearings. I didn't find an official documentation page from the seller, but the Amazon post comes with a helpful video showing all the steps required for the assembly. Use this link if you can't find it:
Water Spray Mechanism
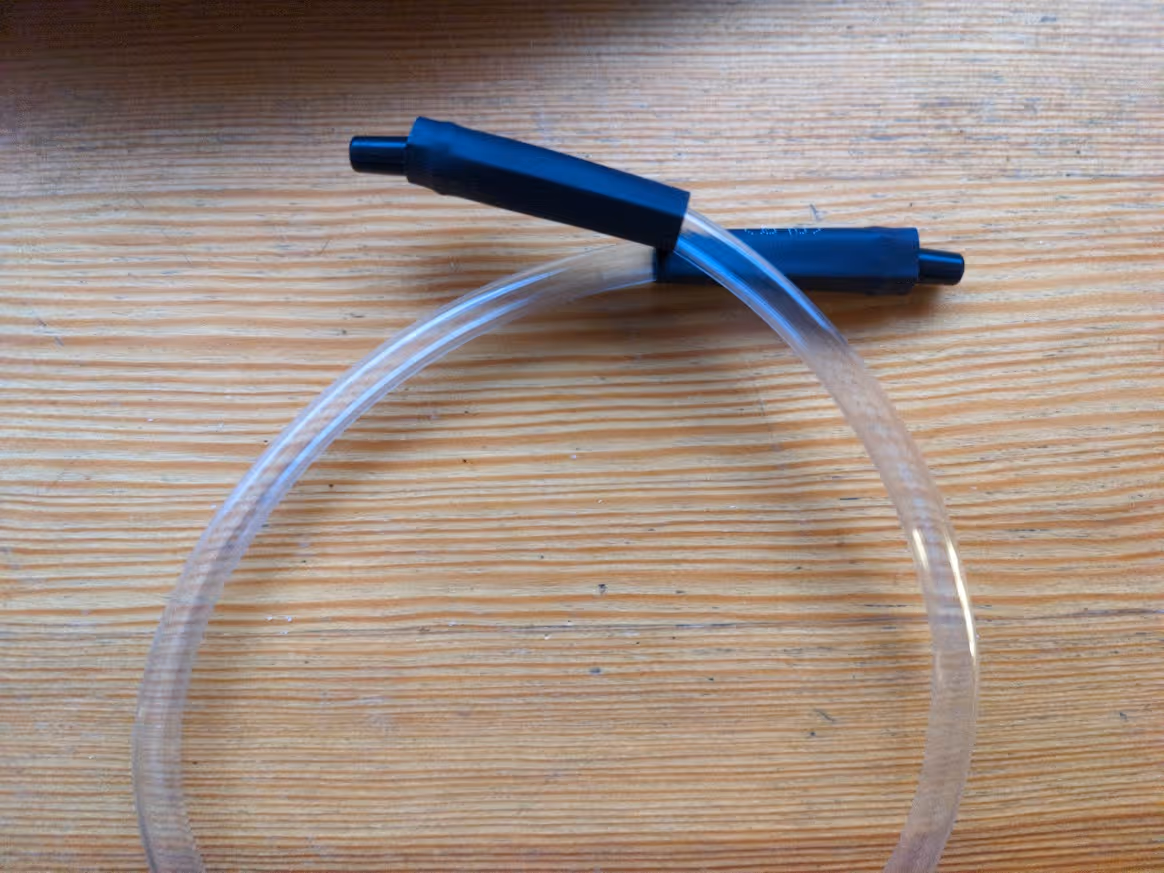
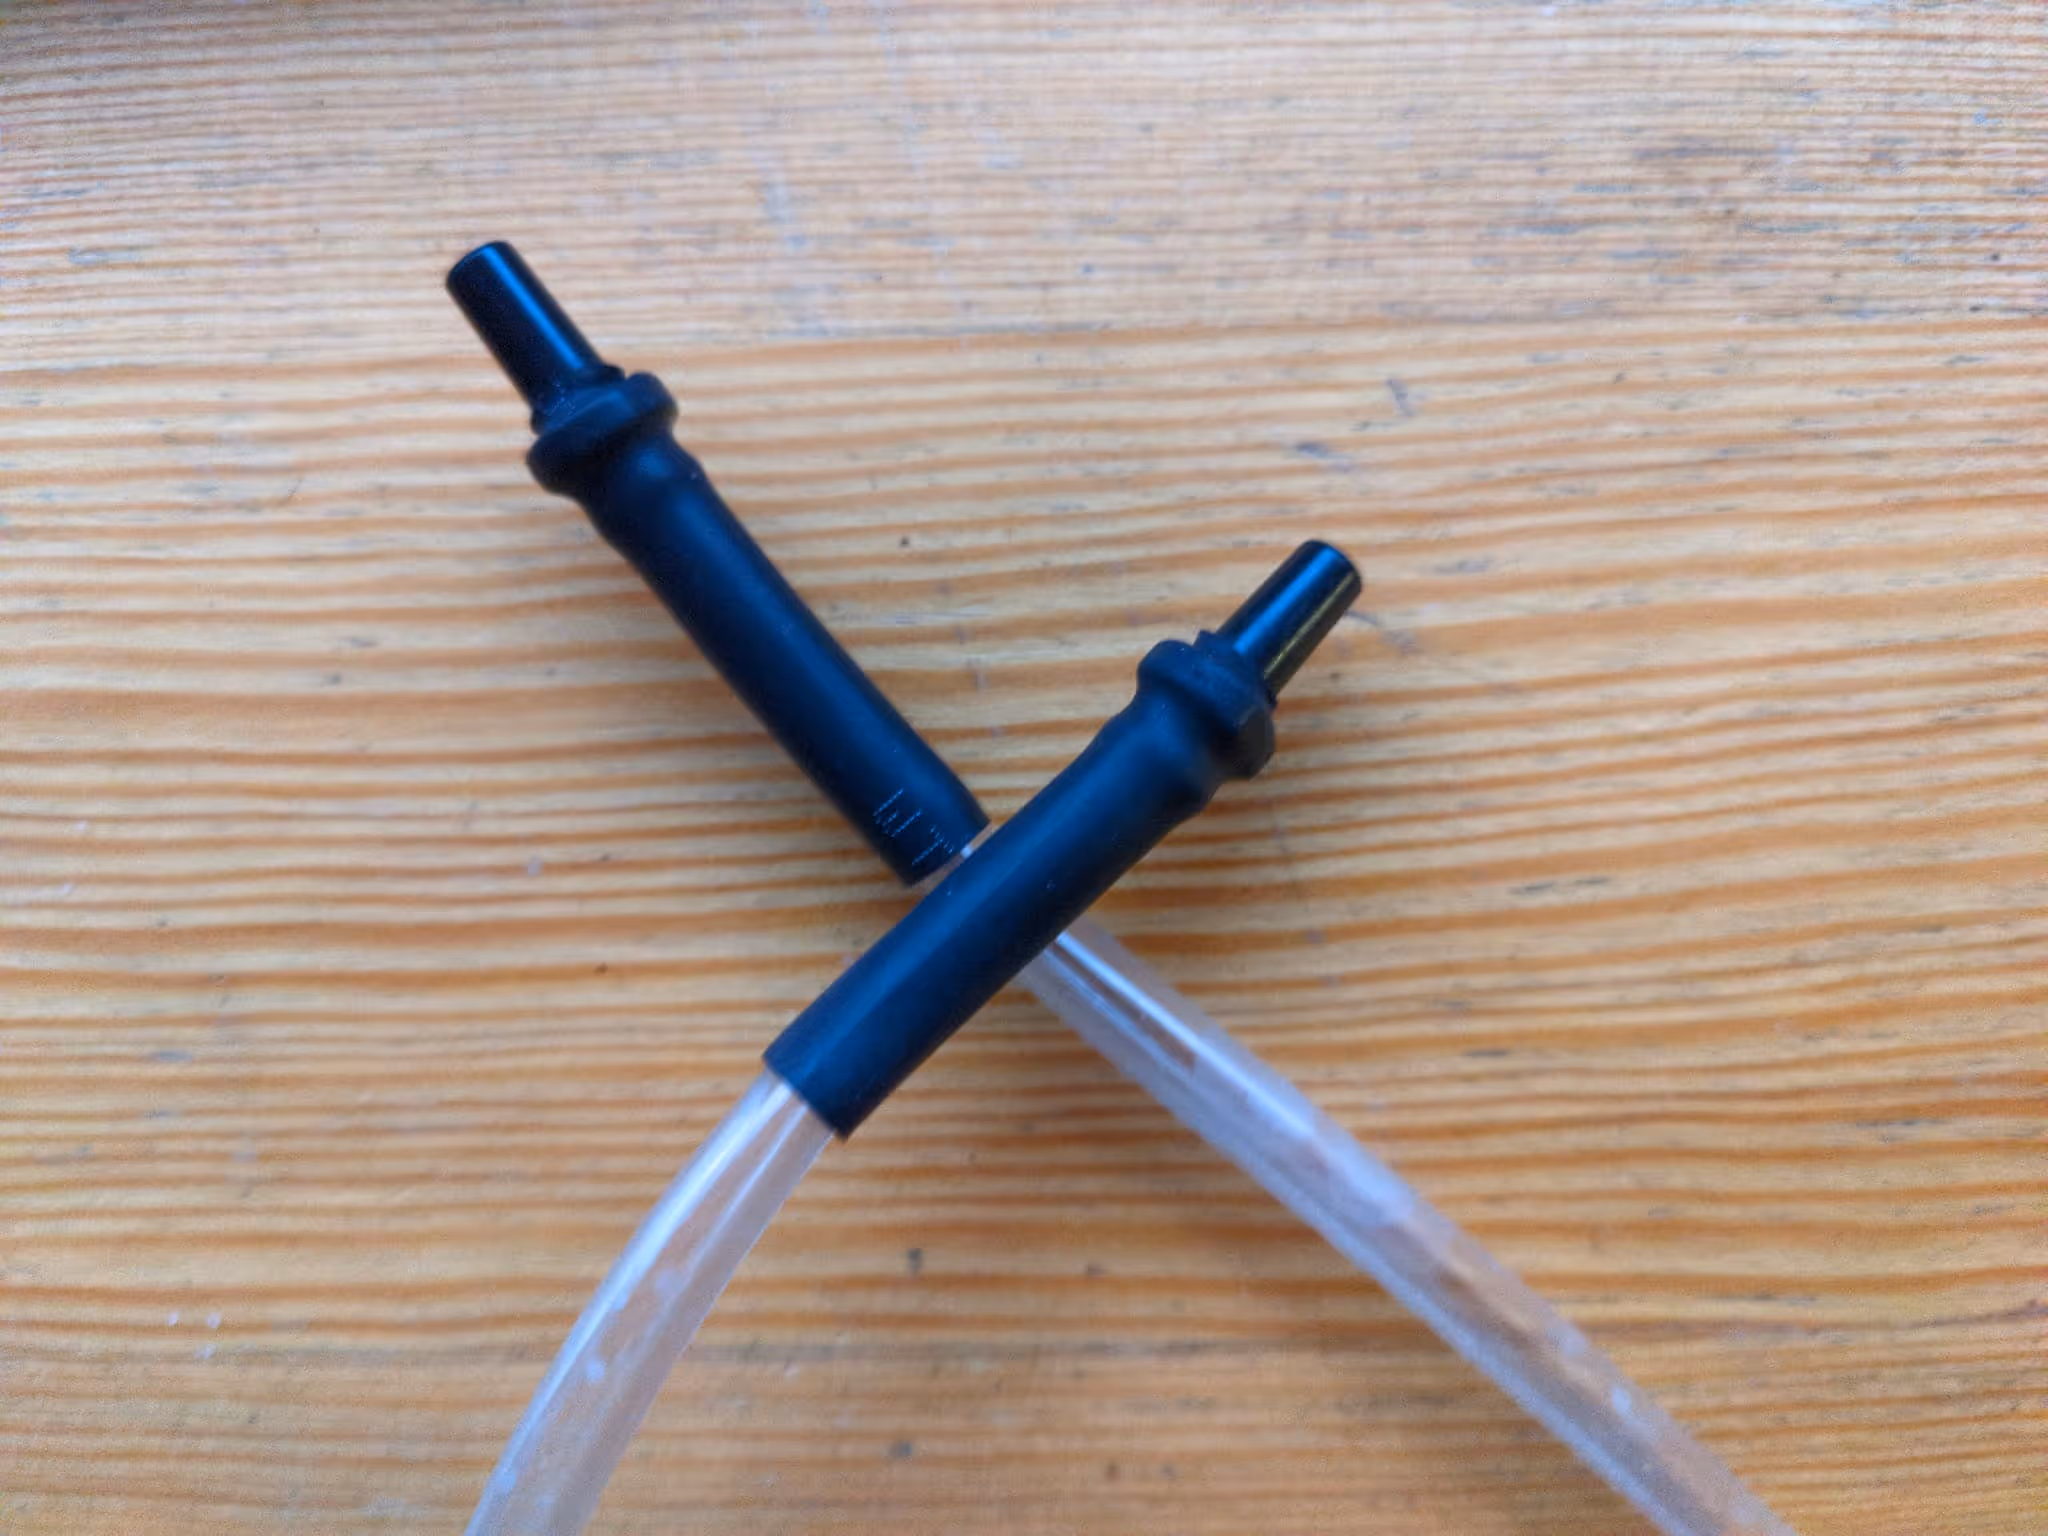
- Cut a piece of vinyl tubing to the desired length and attach male couplers to both ends of the tubing.

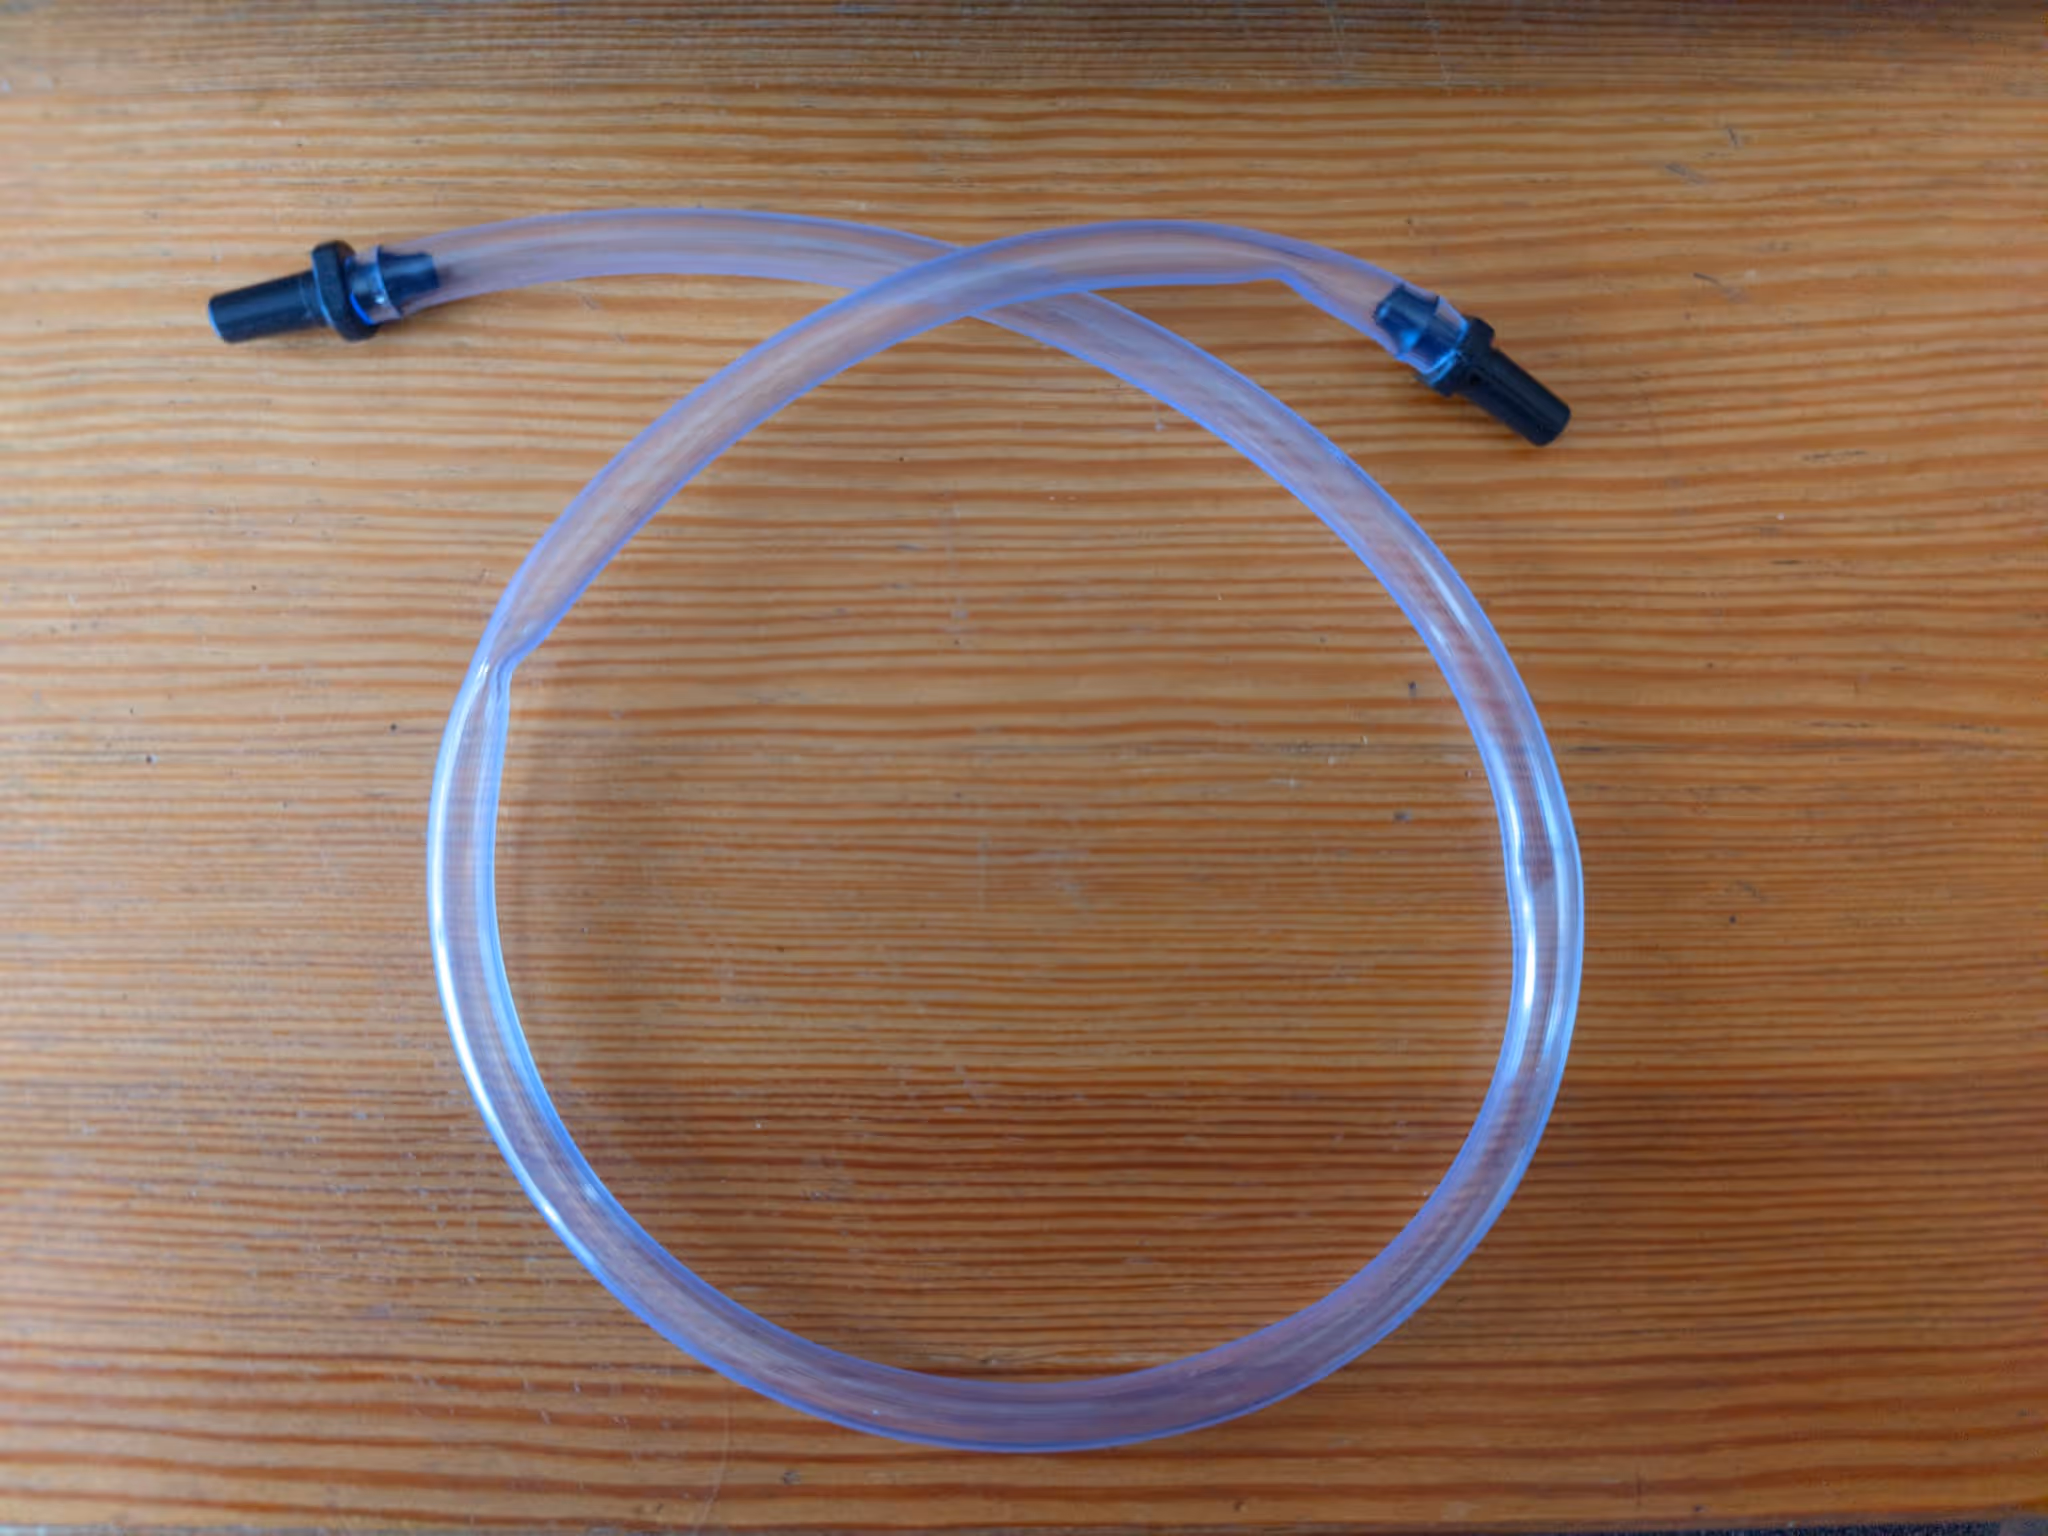
- Use heat-shrink tubing and a heat tool to secure the couplers in place. This should prevent the couplers from coming off when the water pressure increases.
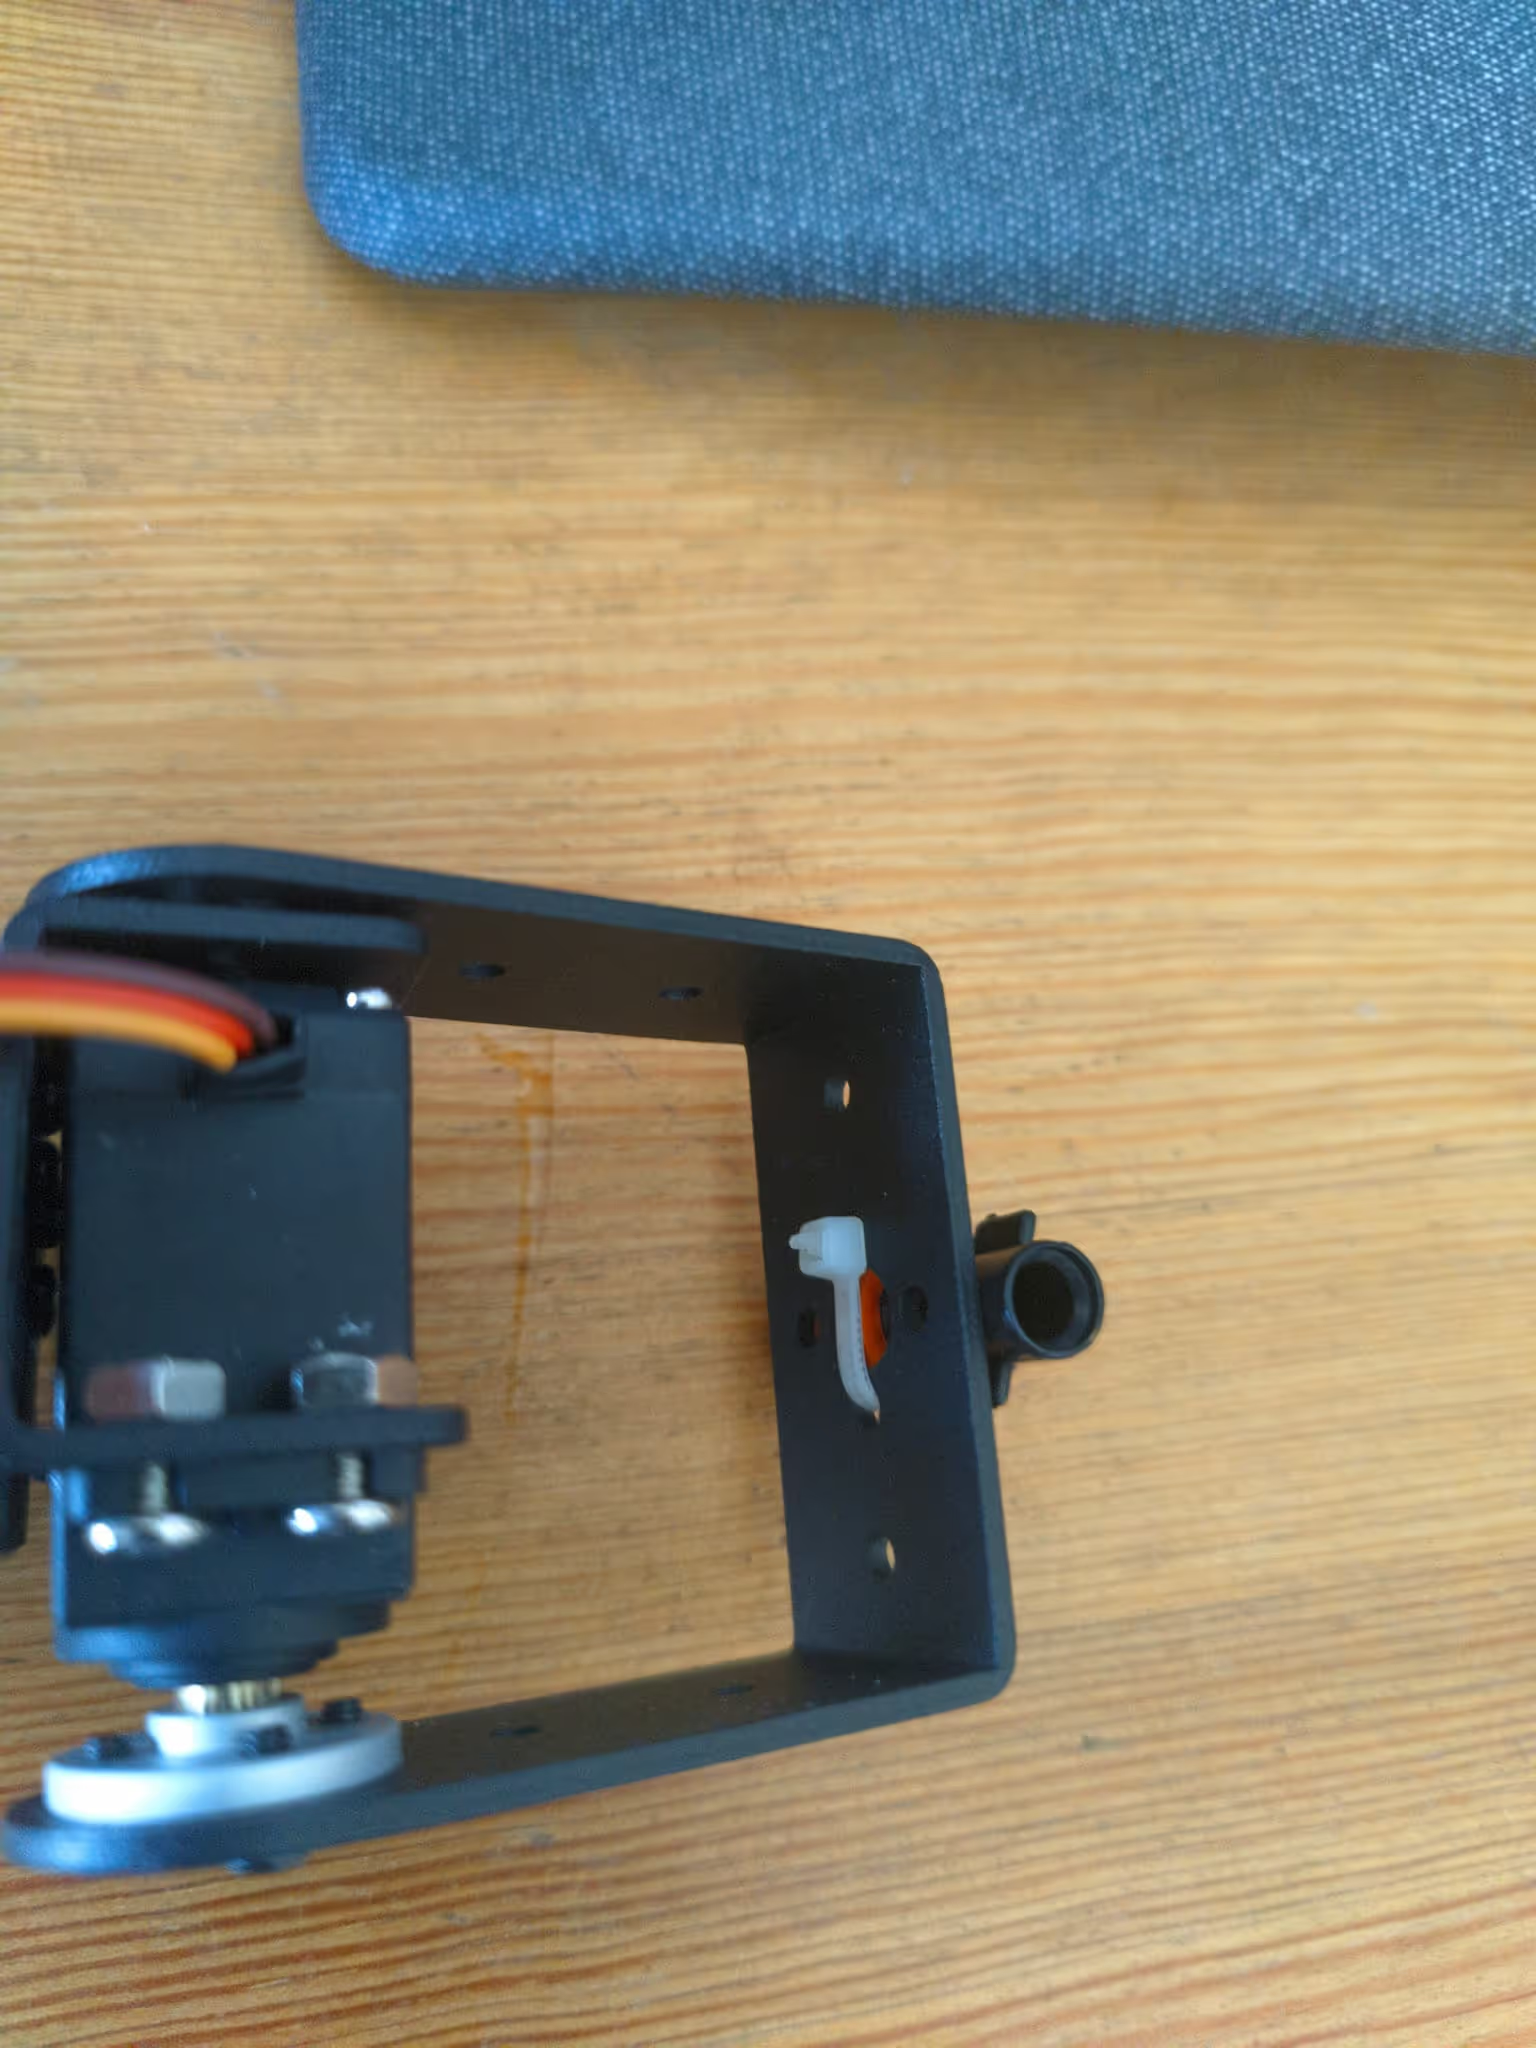
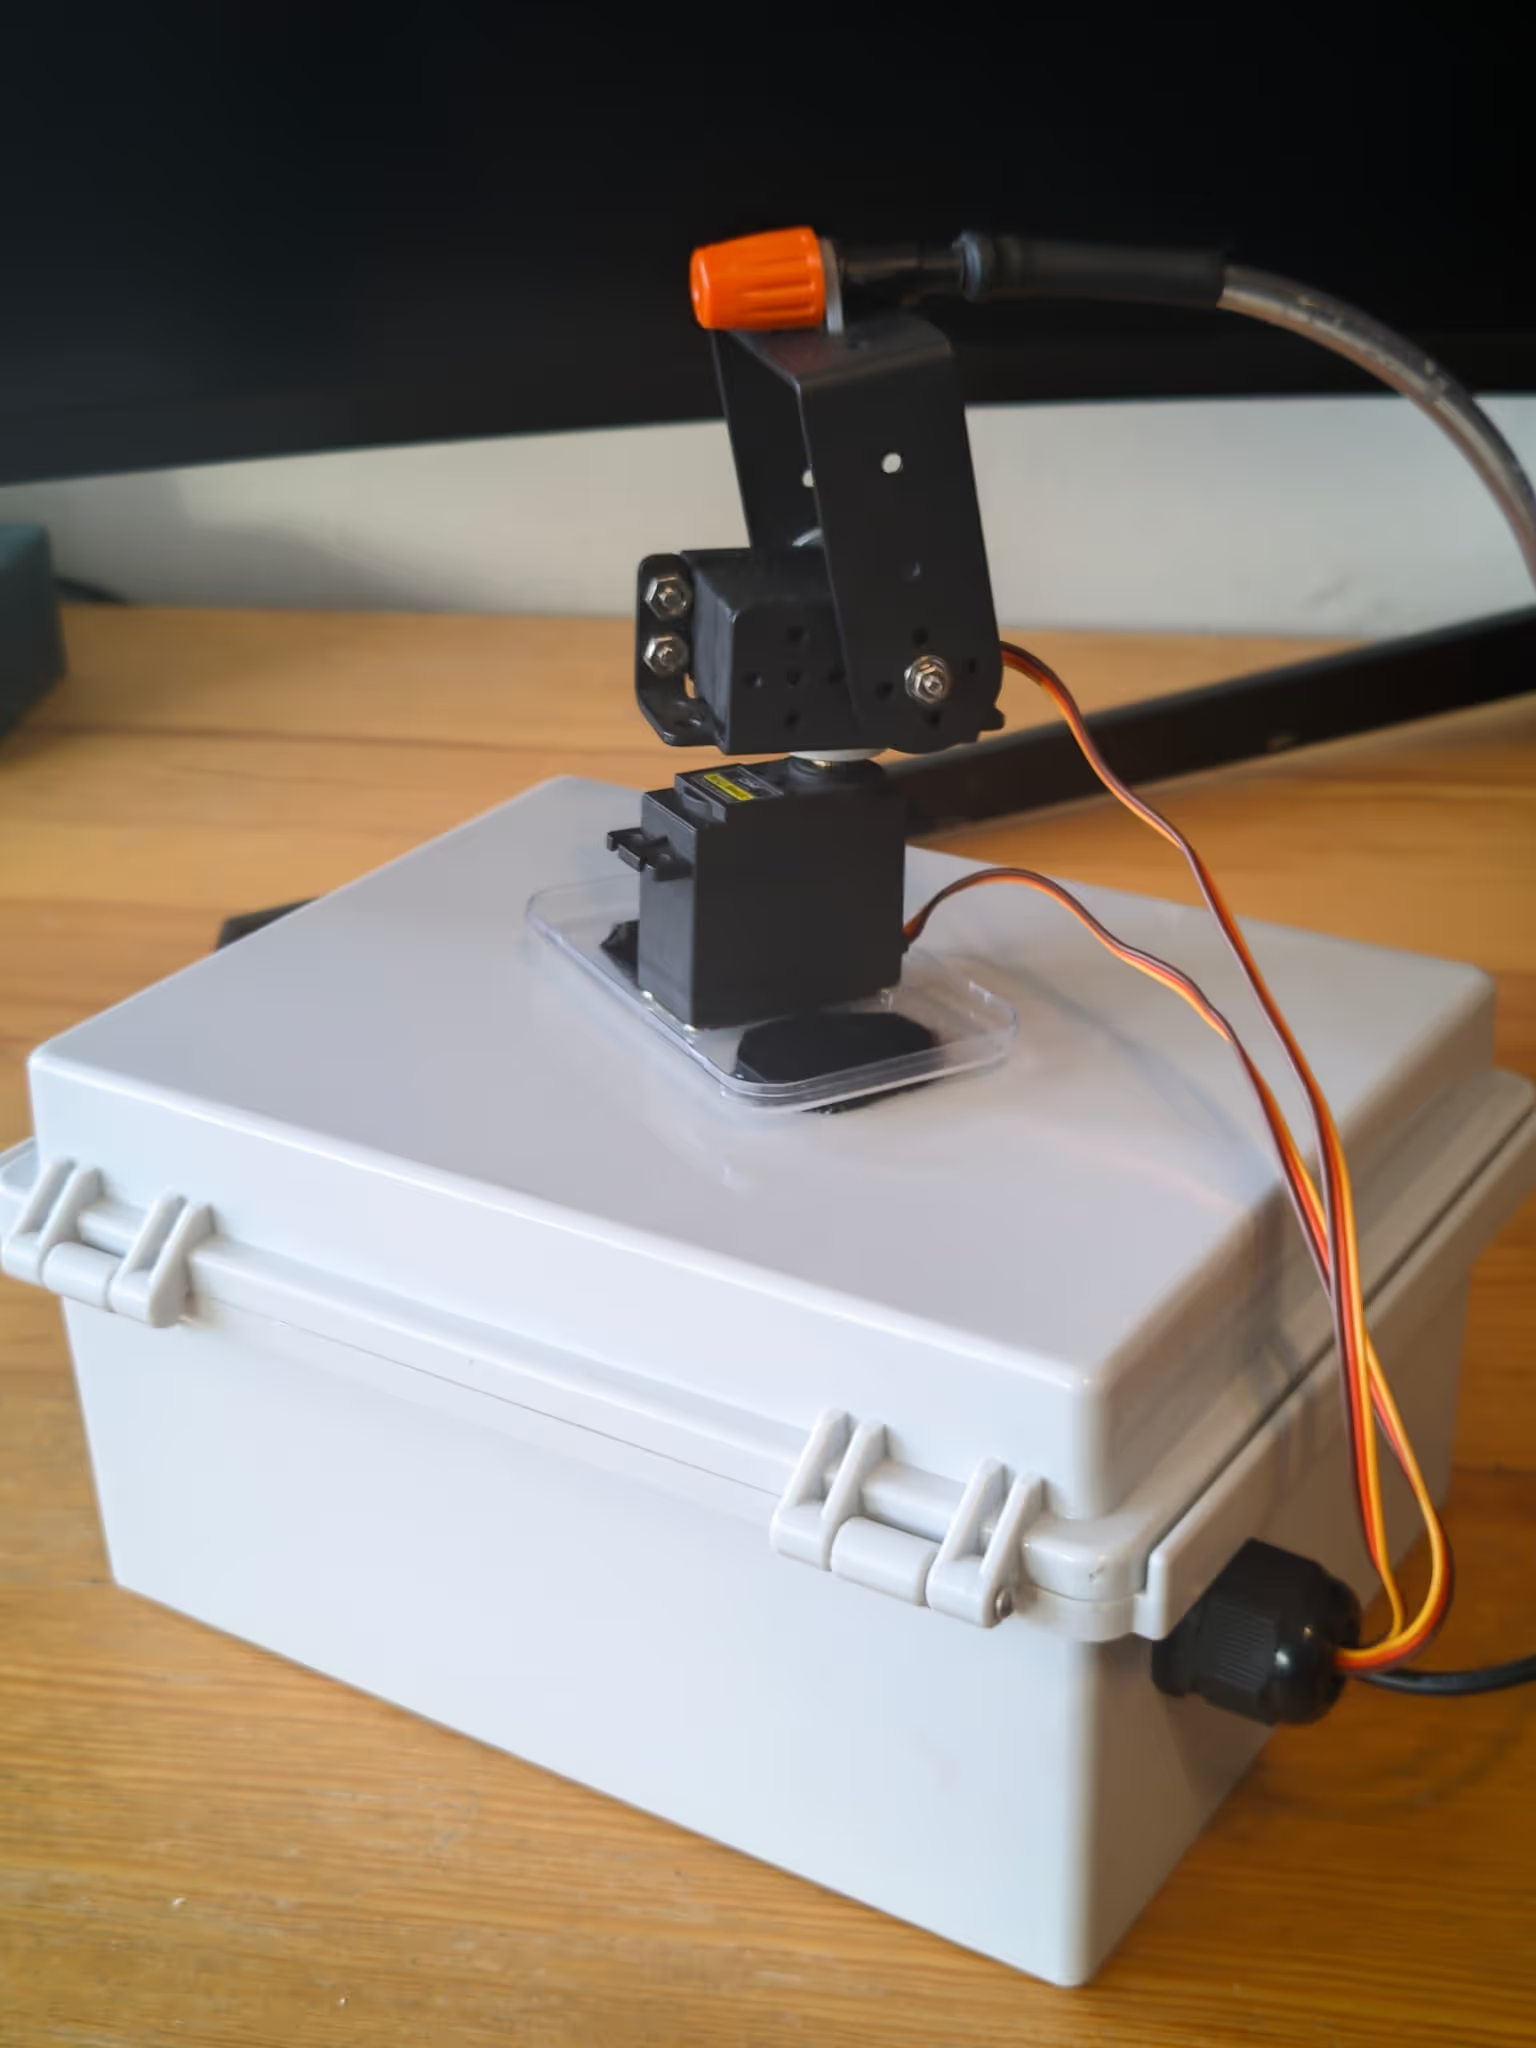
- Secure the nozzle to the servo pan-tilt using zip ties. I found best to route the zip tie over the threaded section of the nozzle and tighten the orange cap to secure it in place, otherwise the nozzle might wiggle when the servos move.
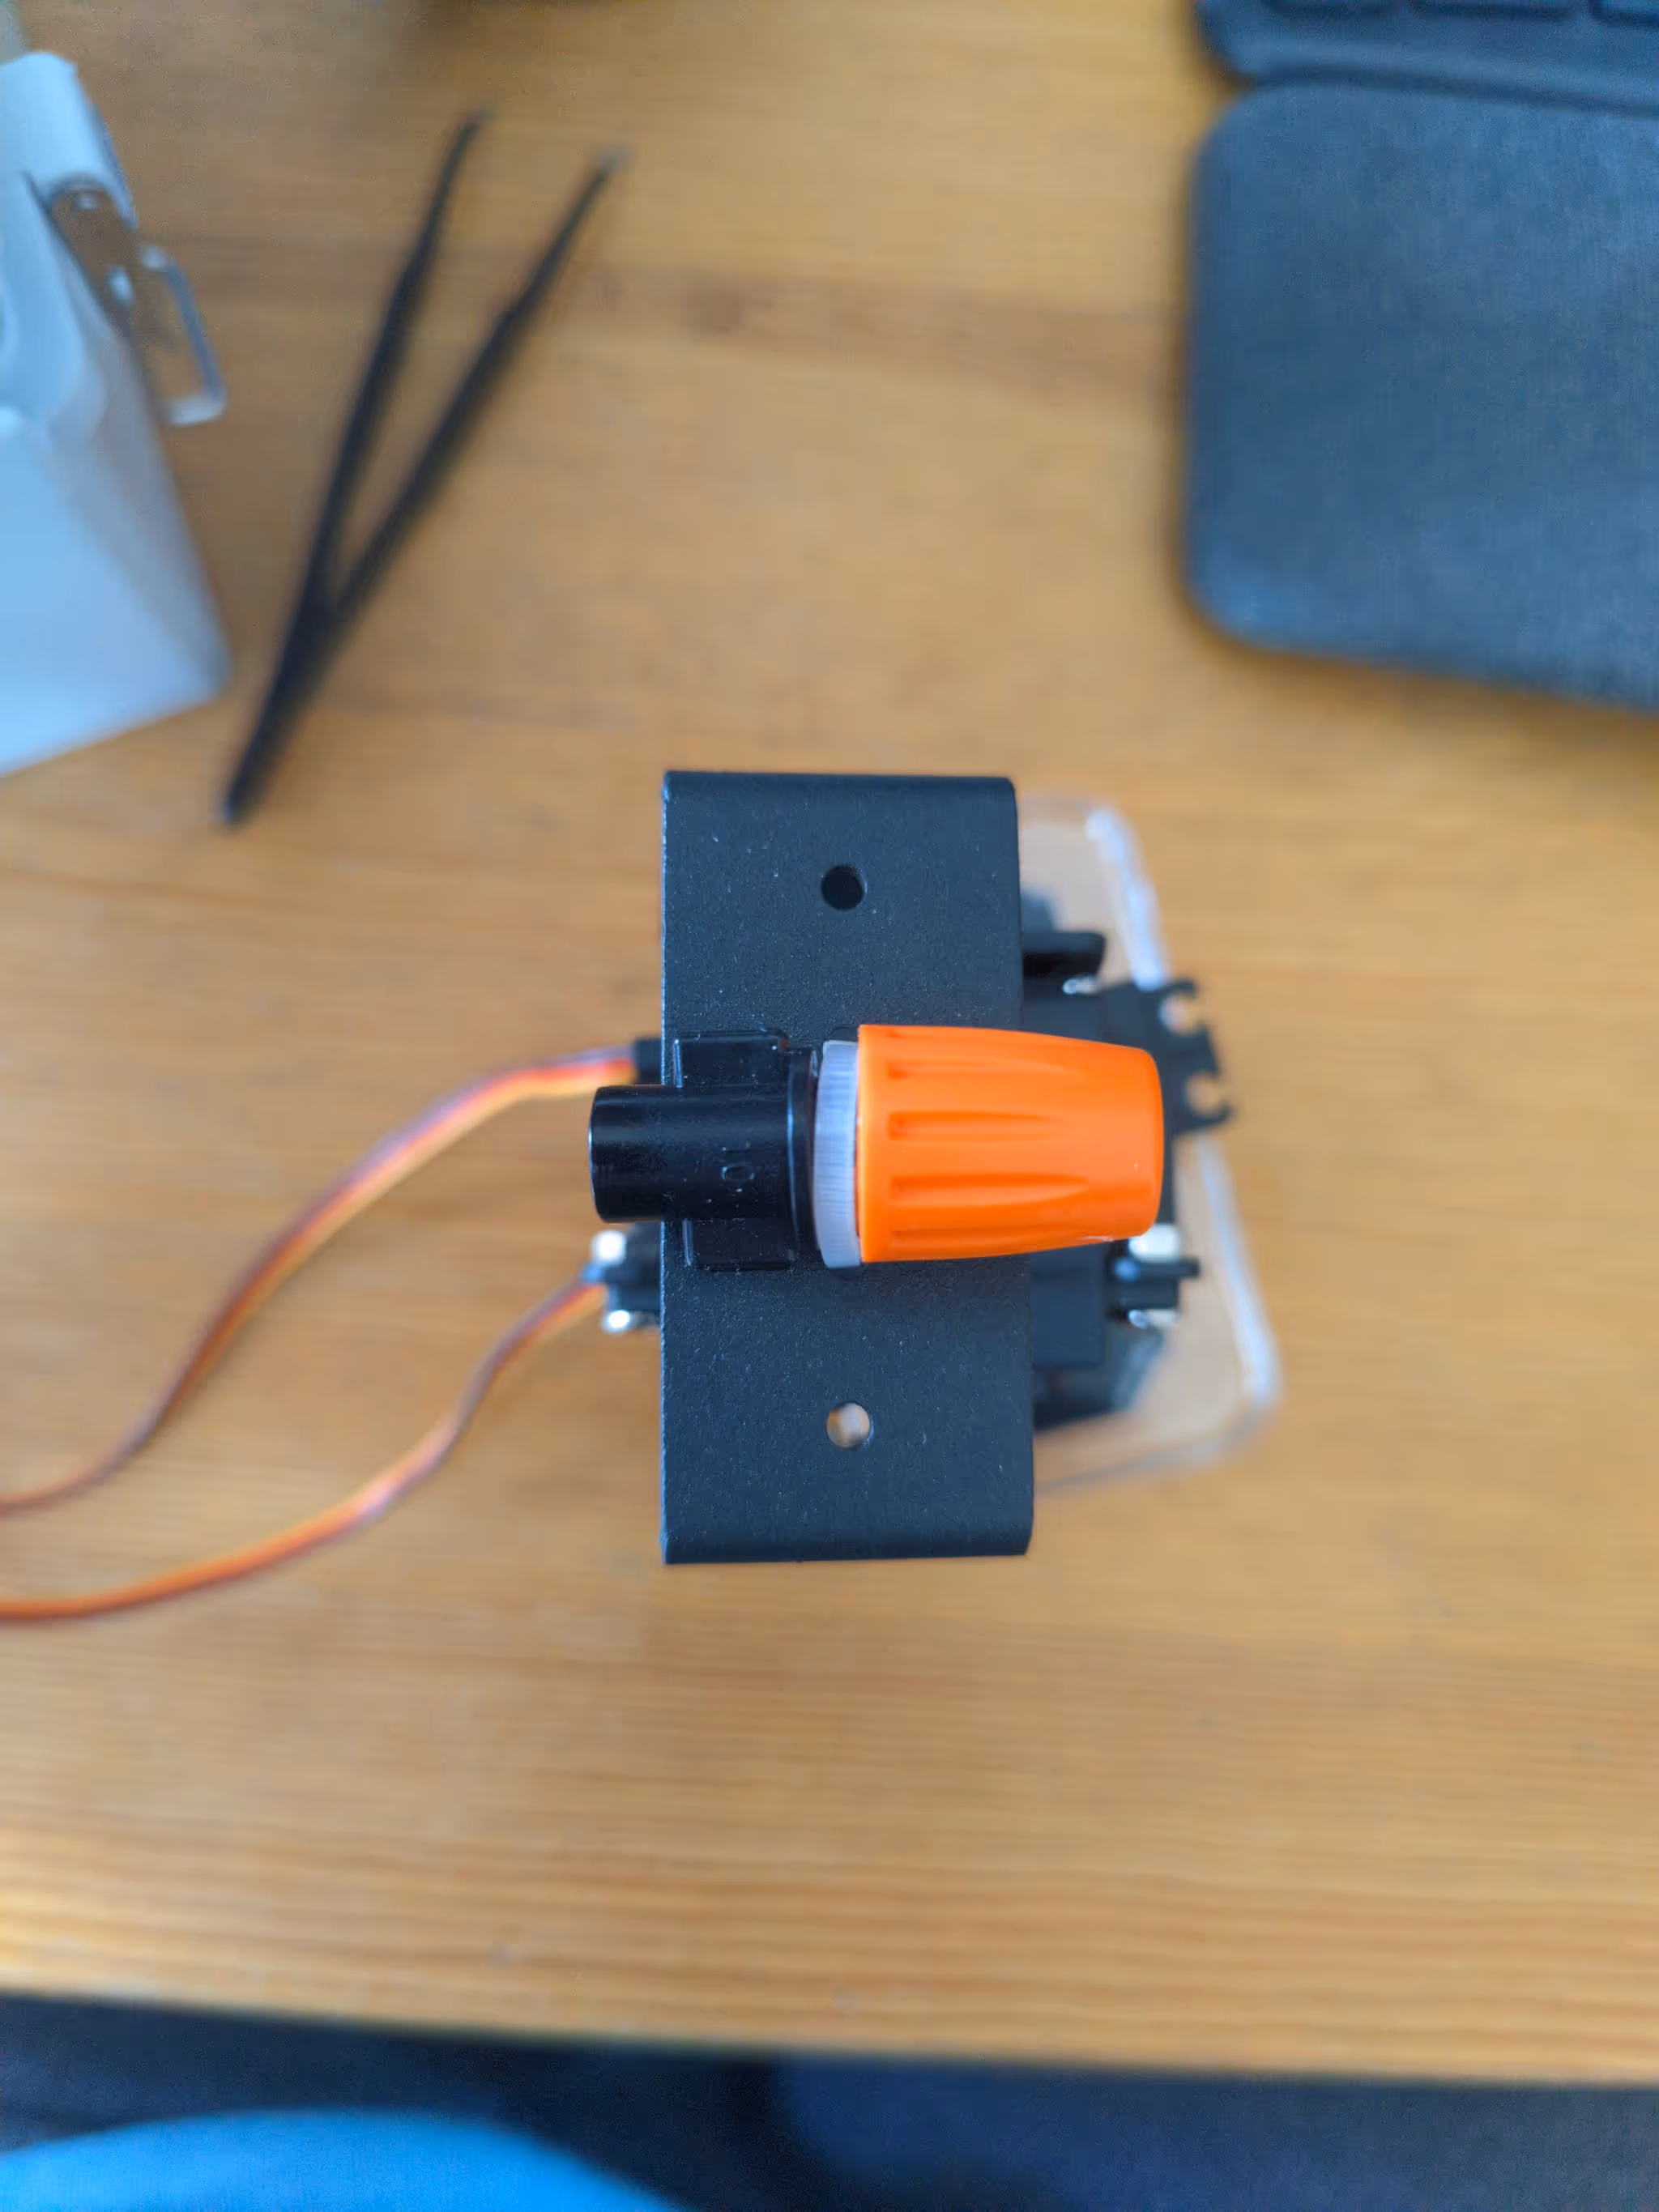
- Now we can attach the vinyl tubing from the water pump to the nozzle. The couplers should fit snugly into the pump and nozzle, but you can use more heat shrink tubing to secure them in place if needed.
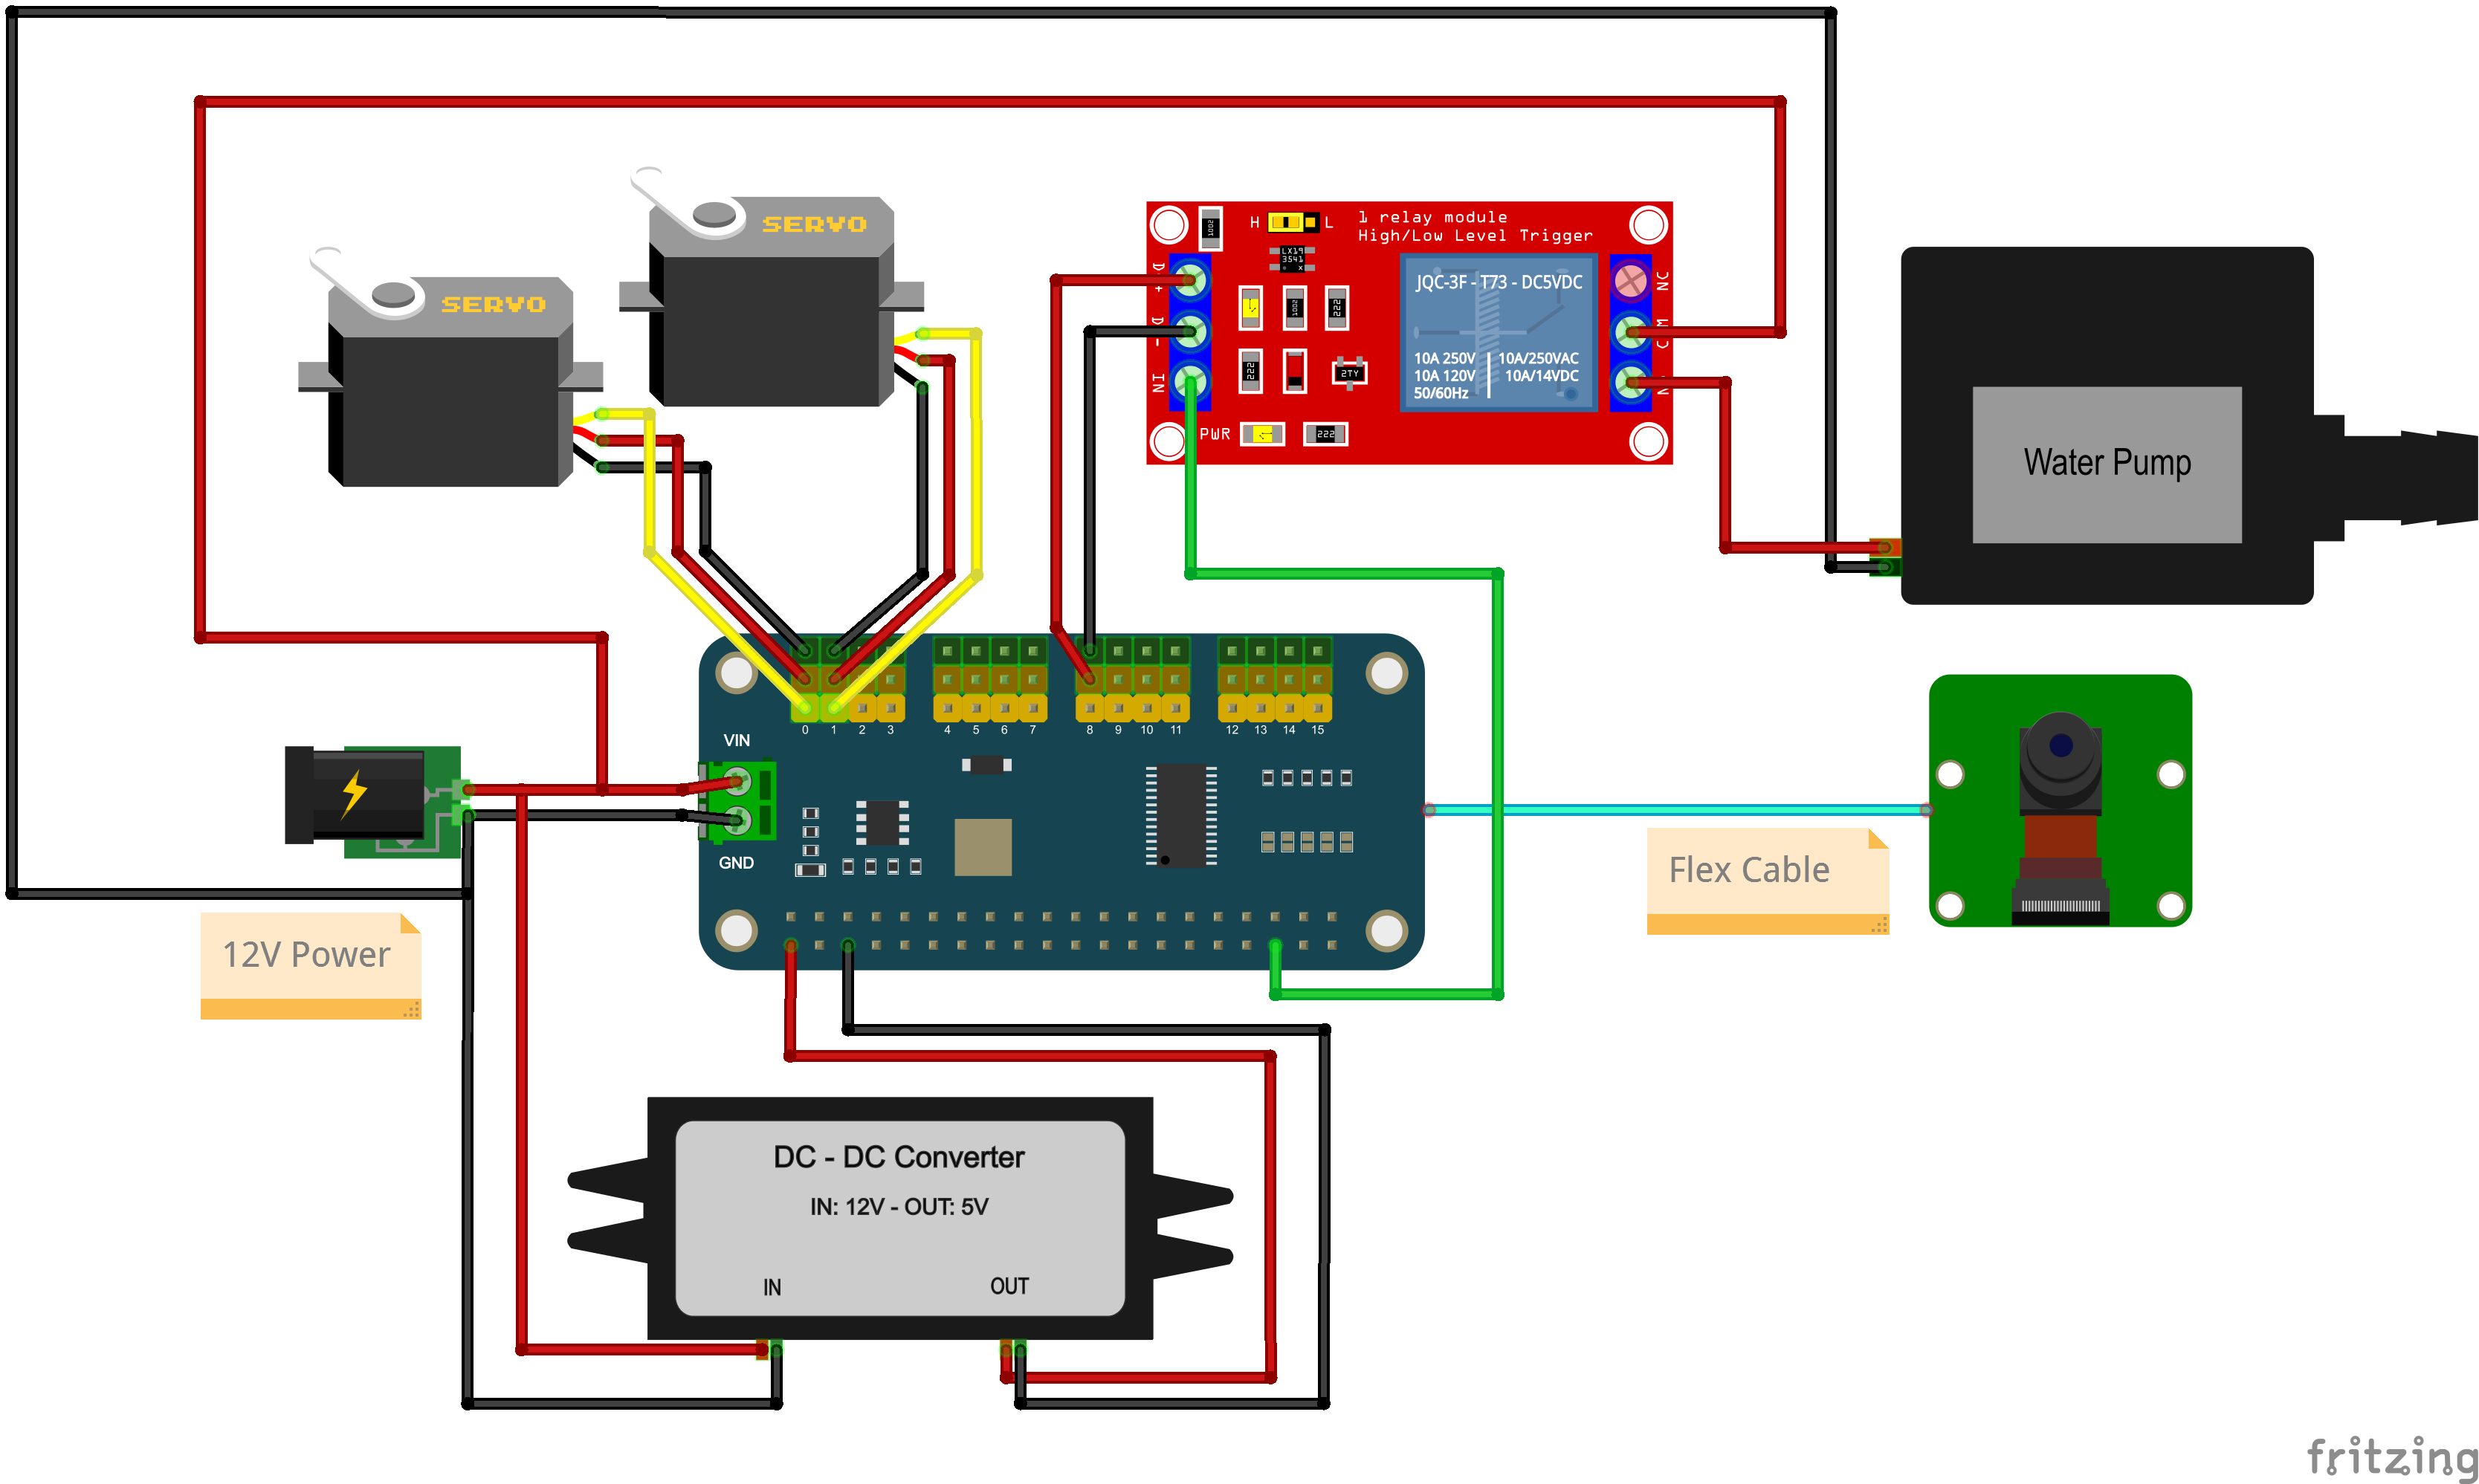
Wiring Diagram
This diagram shows how I wired all the components to the Raspberry Pi Zero 2 W and the WaveShare PWM Servo HAT. For simplicity, I don't show the Raspberry PI, because it only connects to the WaveShare PWM Servo HAT using the GPIO pins and the camera using the flex cable.
CAUTION
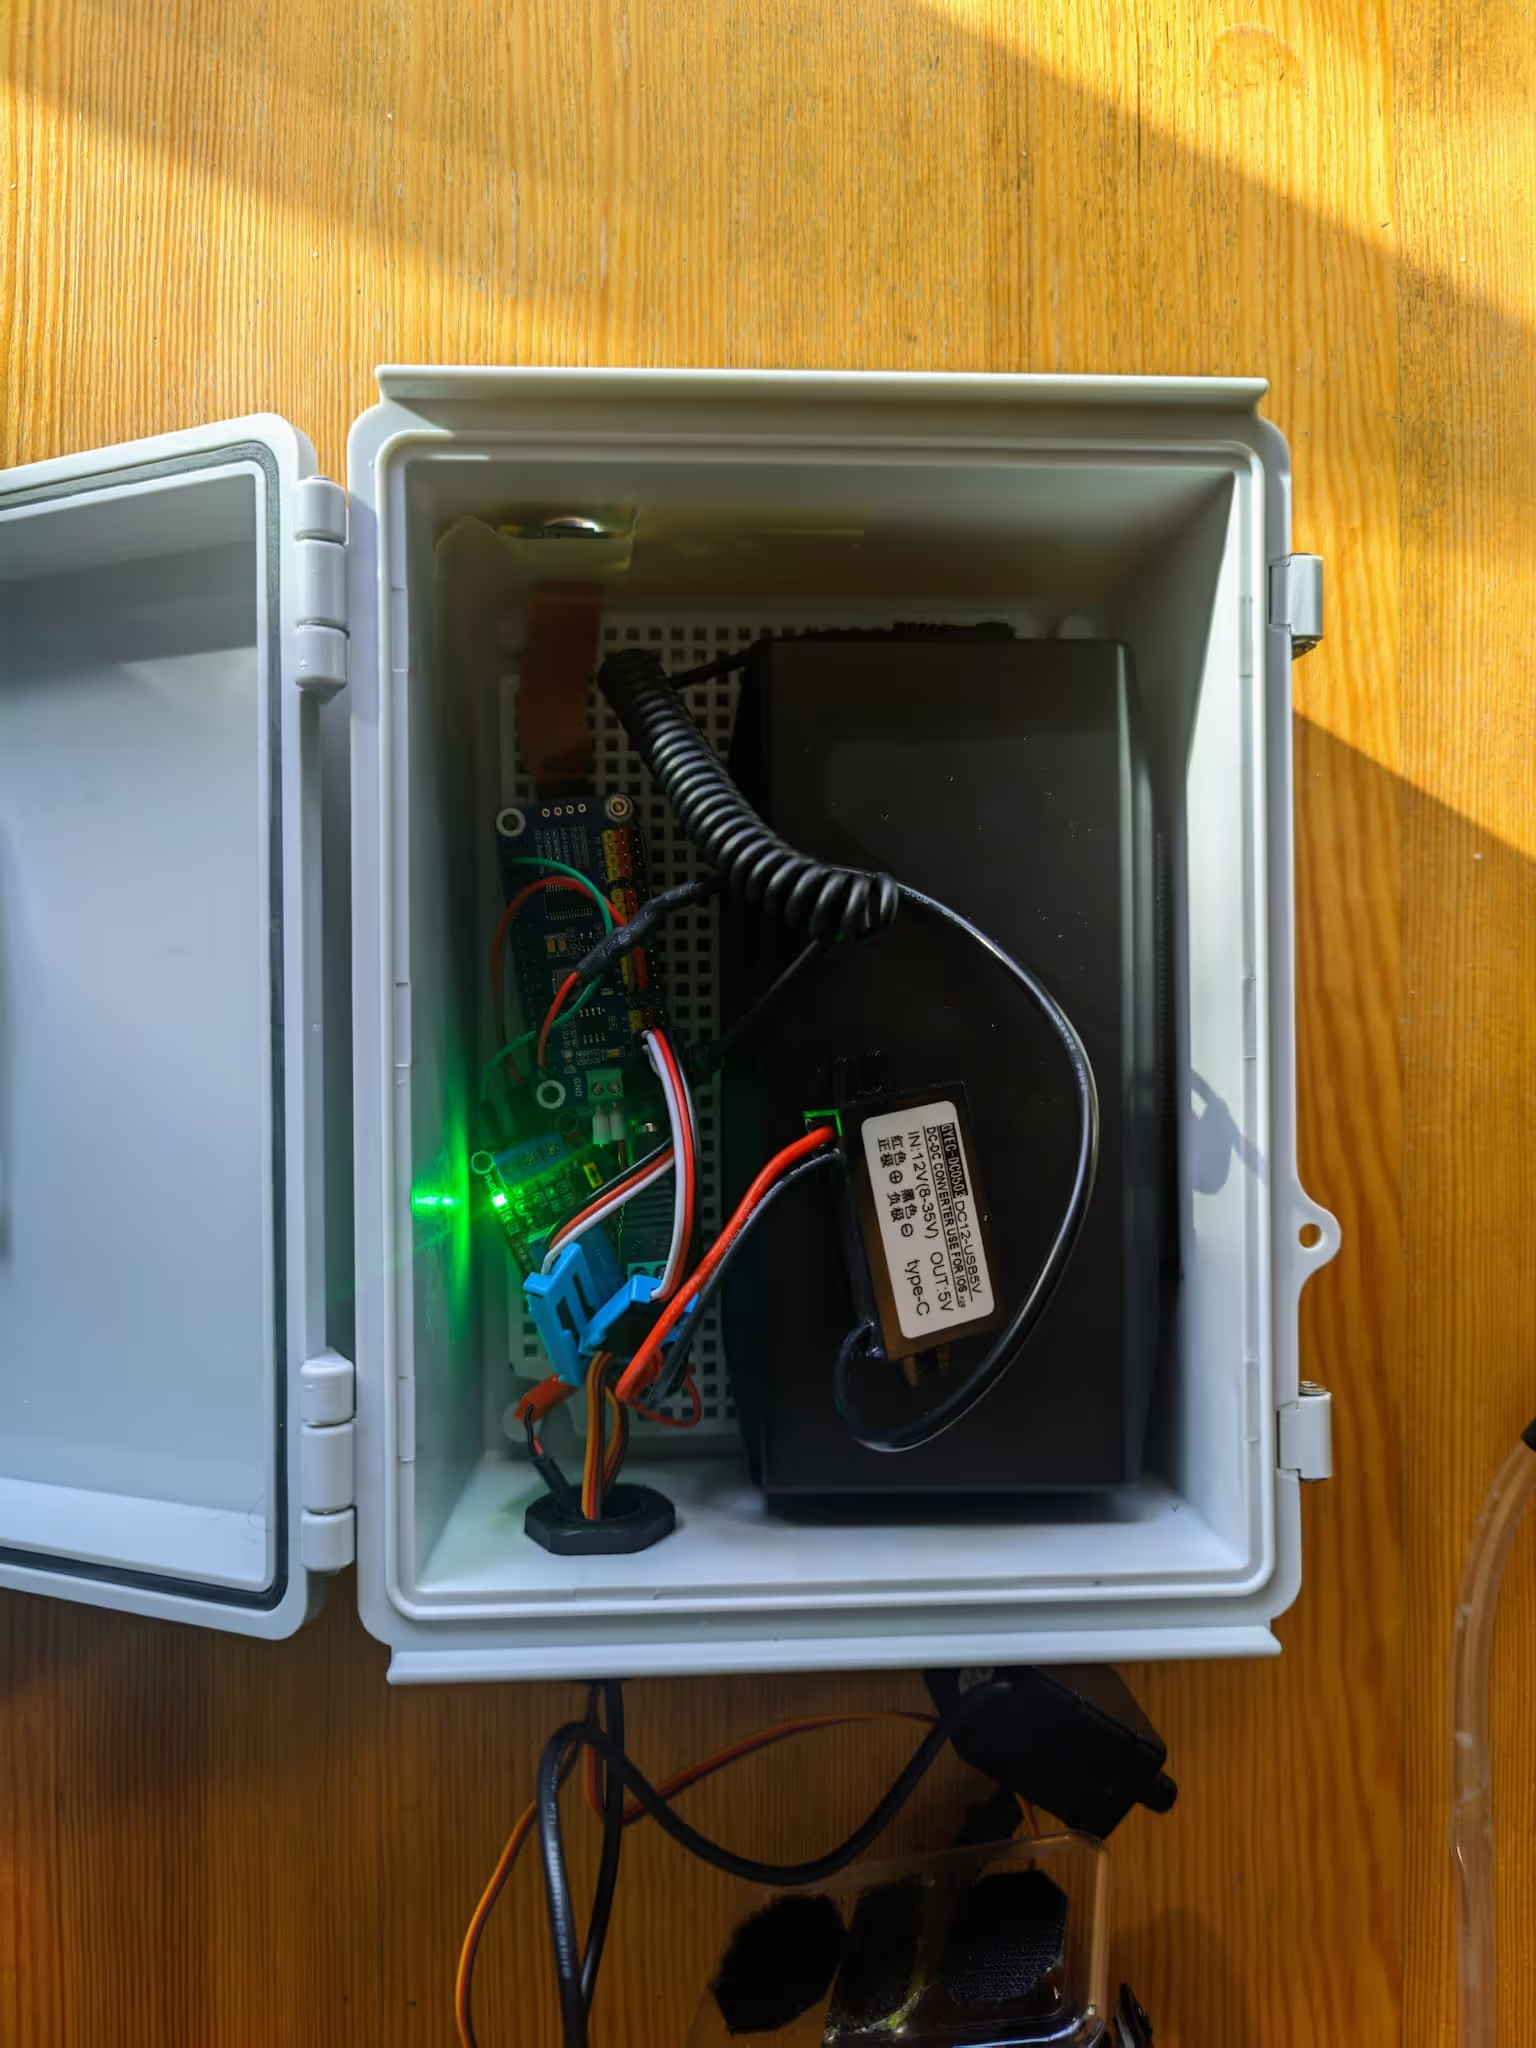
The servos I selected can have high power spikes which cause the Raspberry PI to reboot. I fixed this by powering the Raspberry PI with an external DC-DC Buck Converter. Before using the external DC-DC Buck Converter you MUST first remove the 0R resistor from the WaveShare PWM Servo HAT. You can find the full explanation in the WaveShare Wiki.
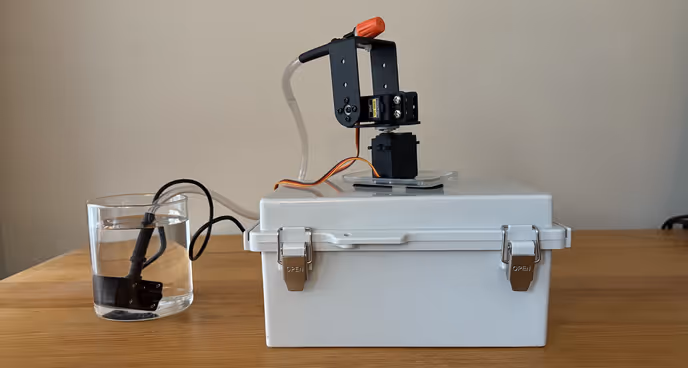
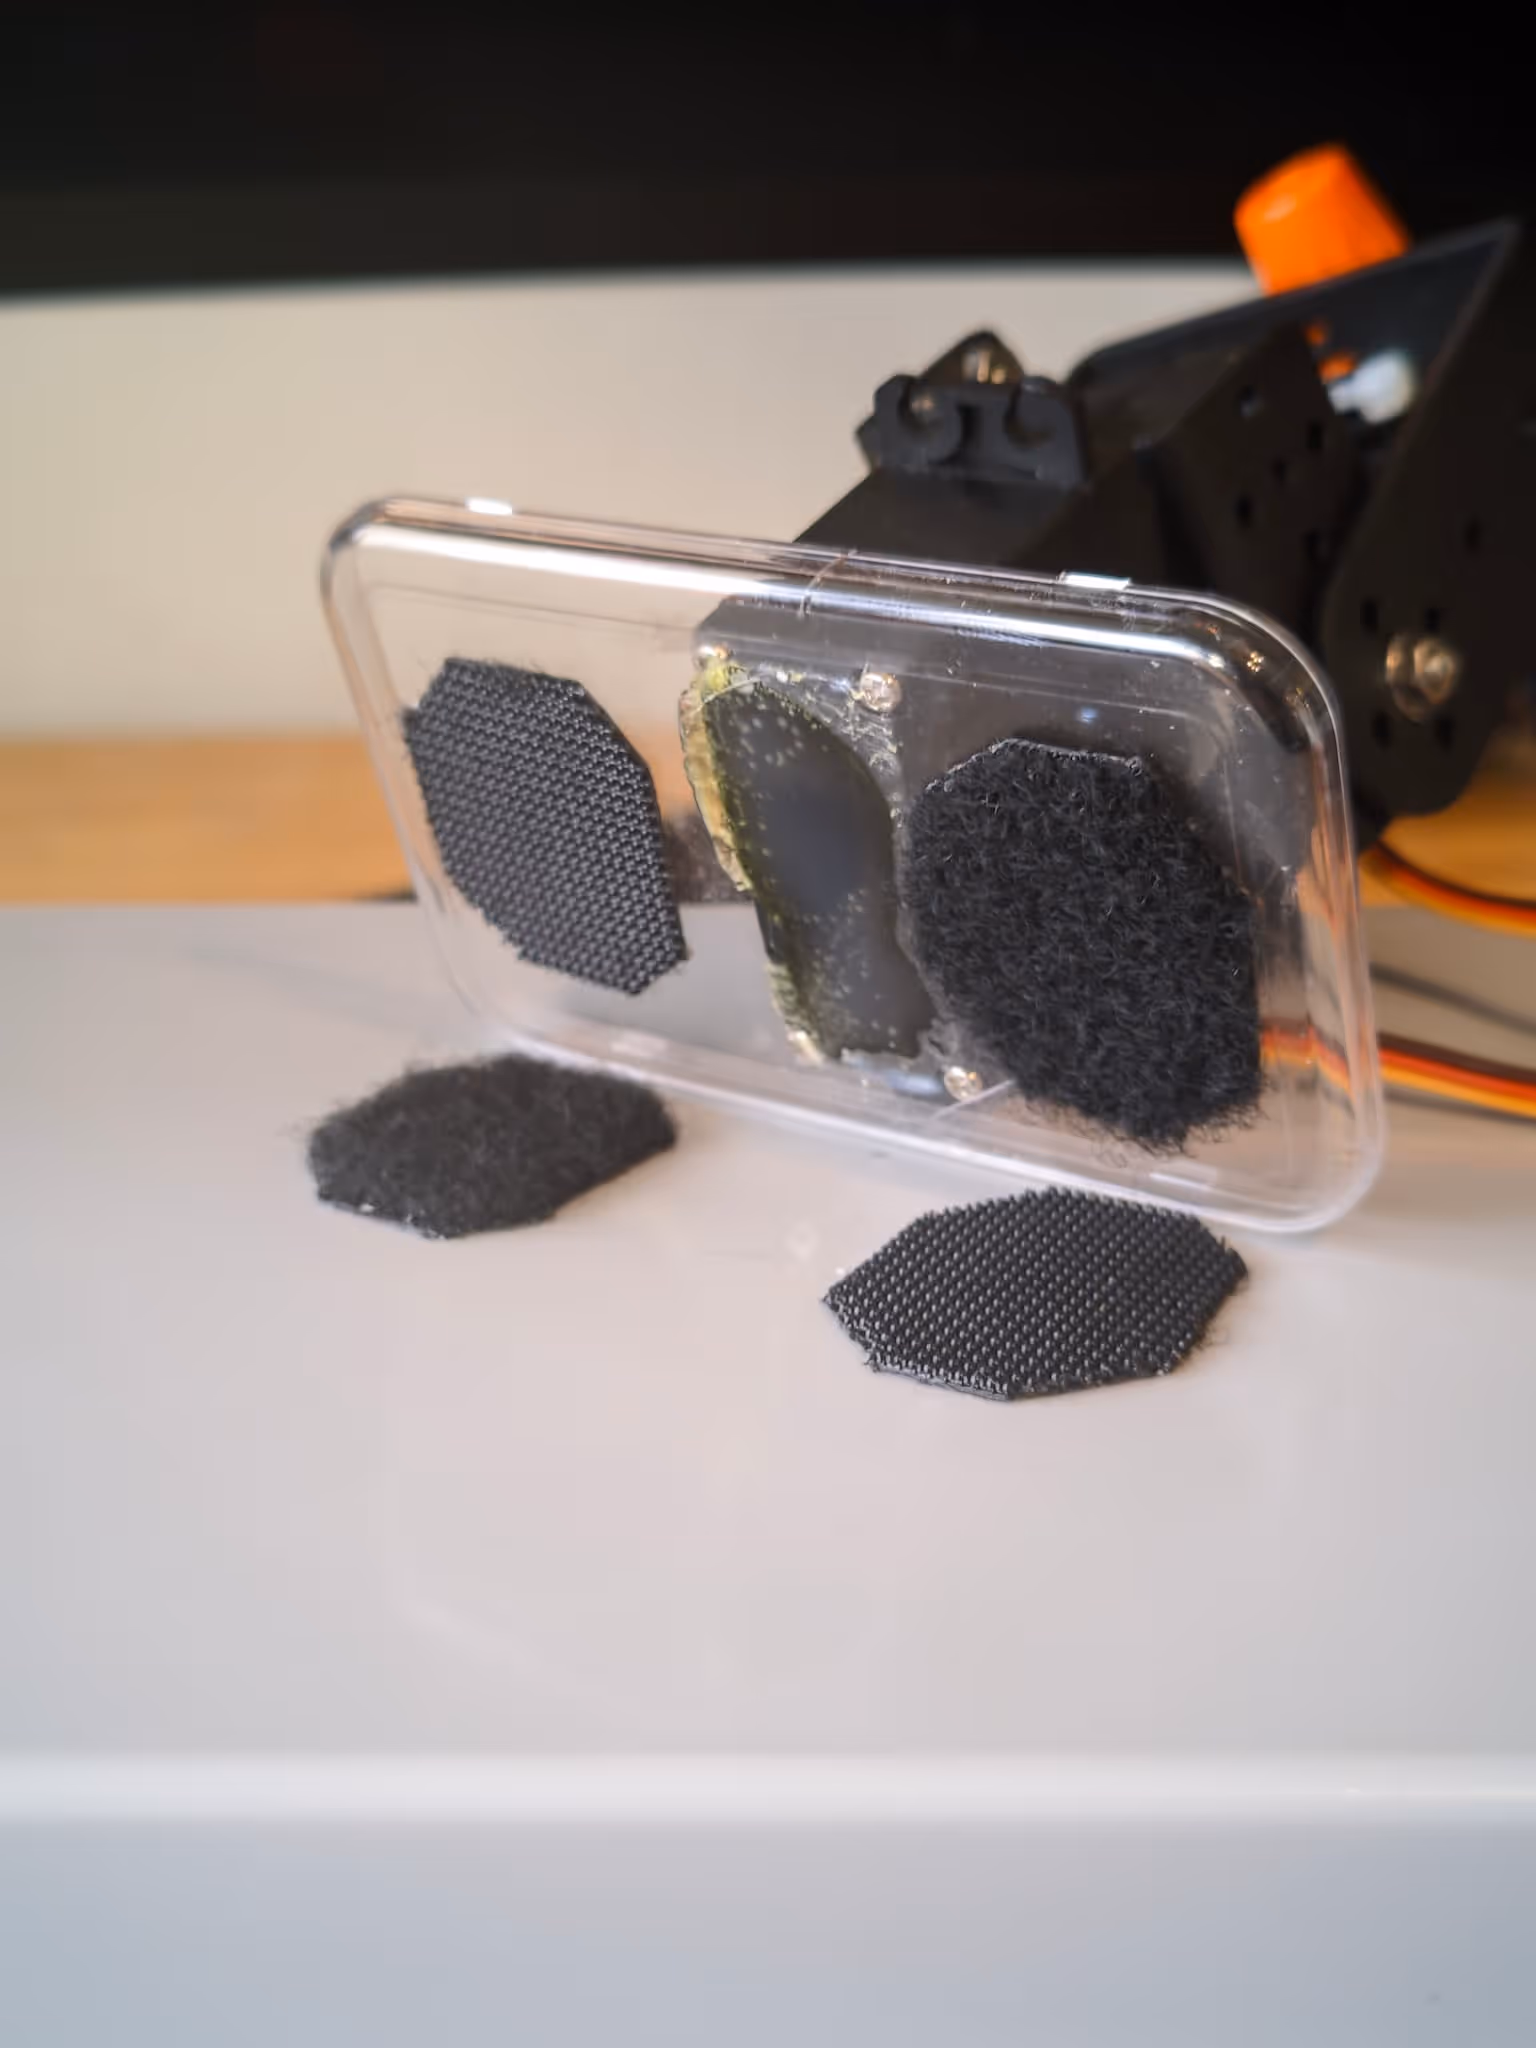
Enclosure
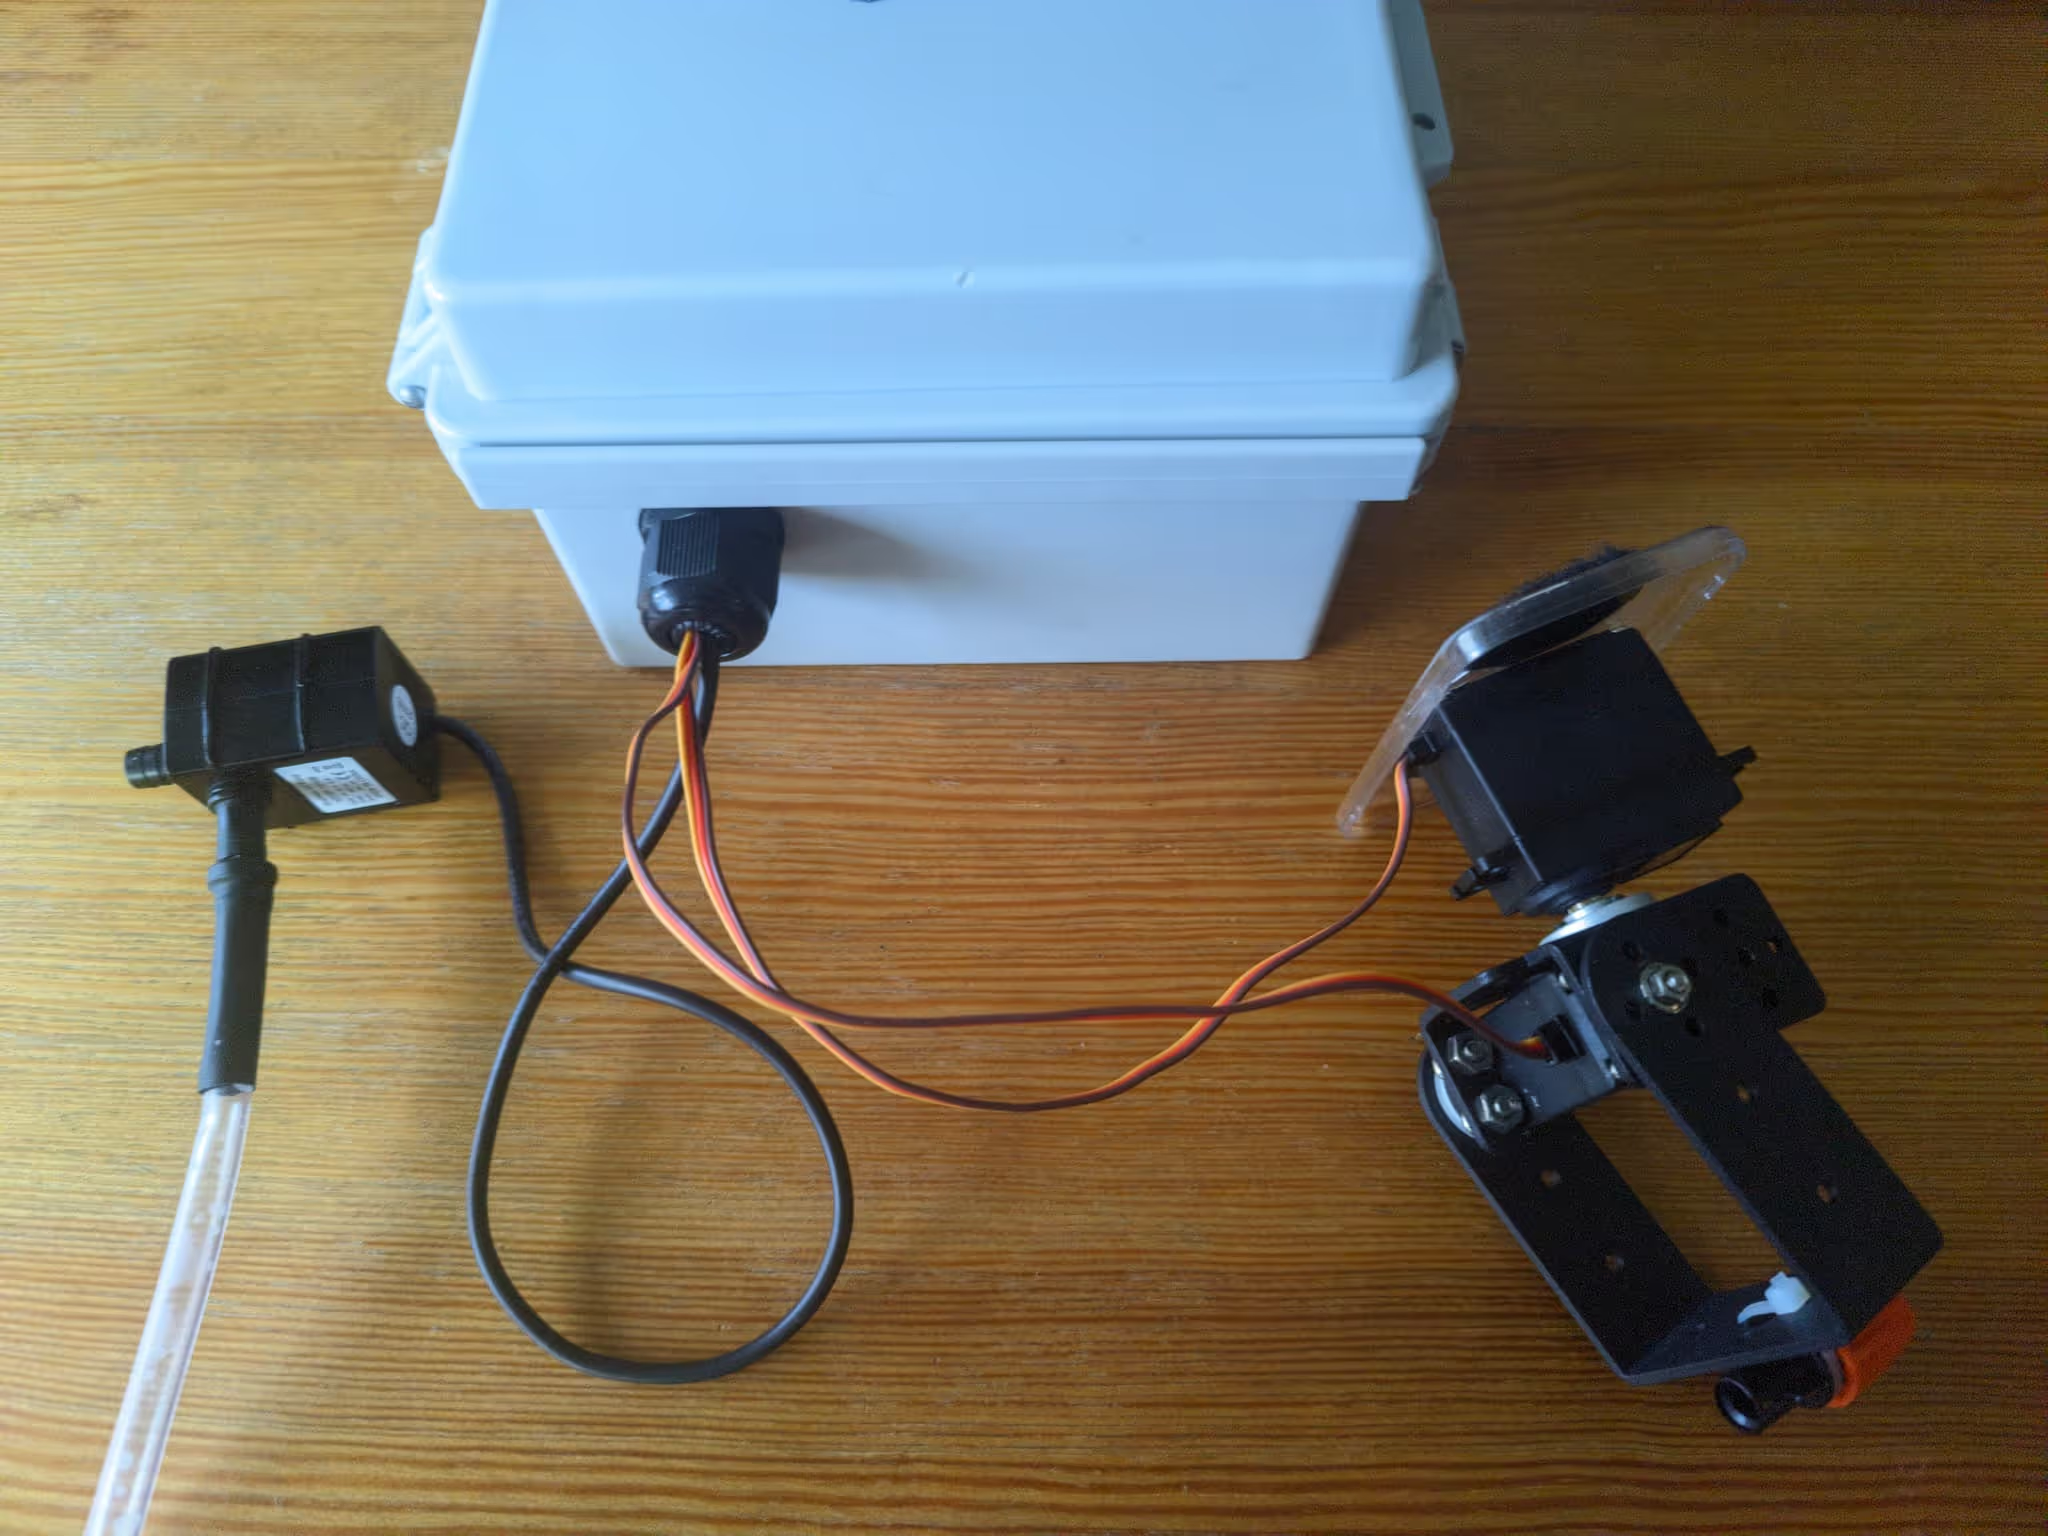
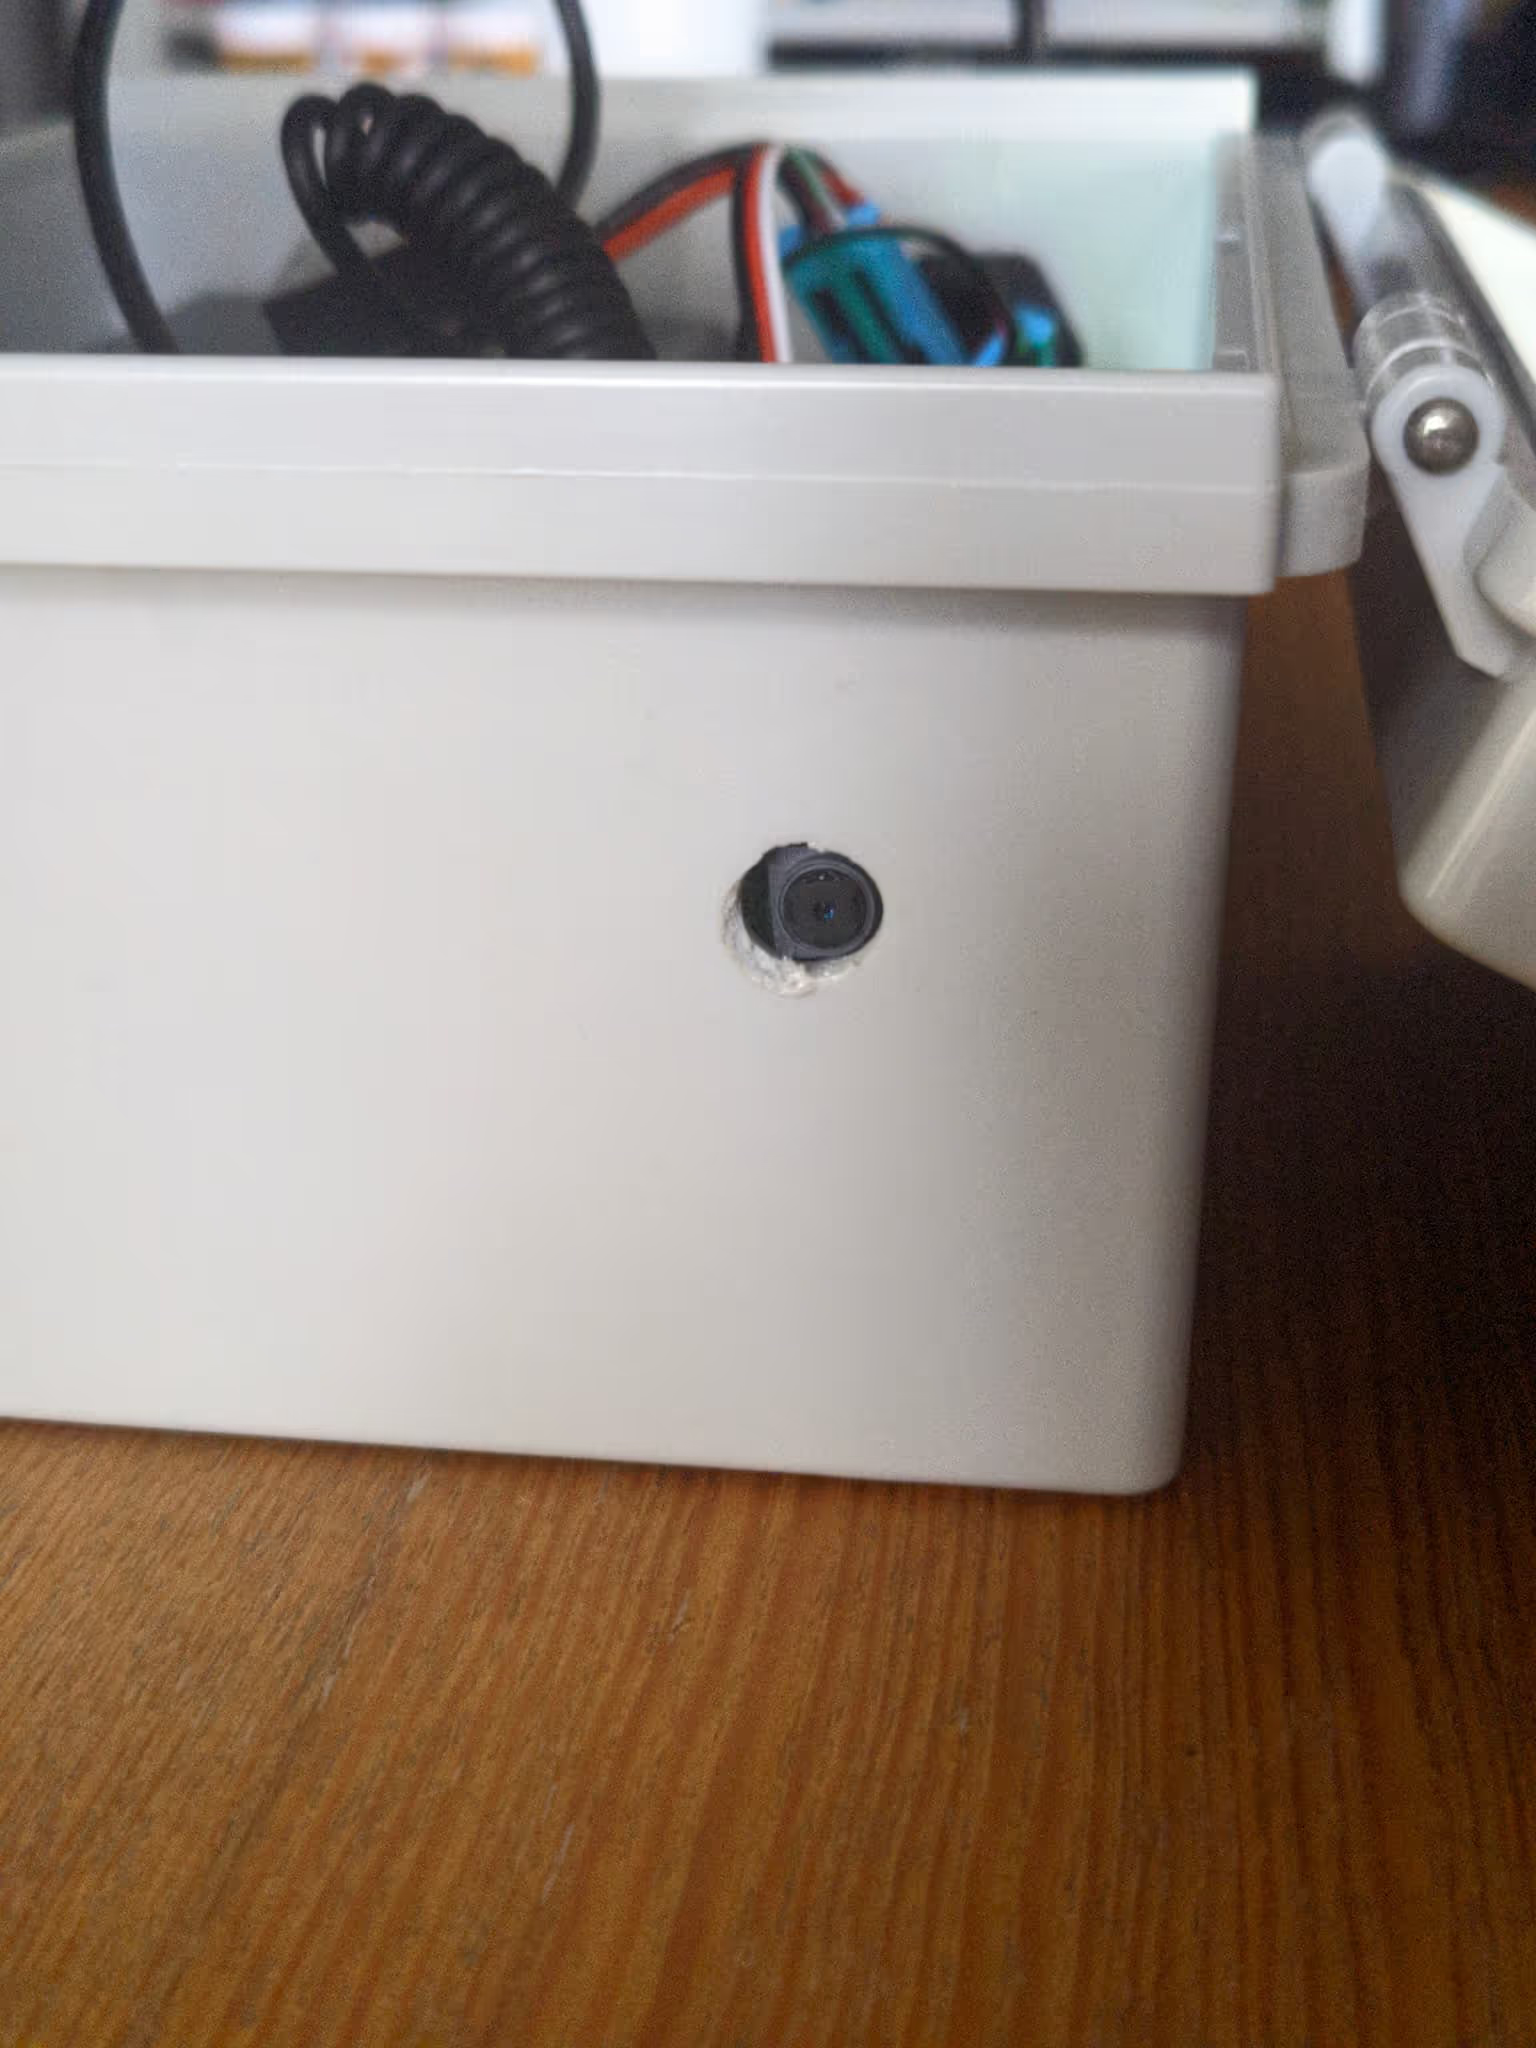
Because the Bird Sentry robot operates on my balcony, I bought a weatherproof enclosure to protect the electronics from the elements. I opted for an off-the-shelf junction box, which included a couple of cable glands. I used a gland to route the cables from the water pump and the servos, keeping all the control electronics inside the enclosure. I also drilled an opening in the enclosure to allow the camera to see outside. I haven't found a good way to seal the opening yet, so for now, I use a packet of silica gel to absorb the moisture that gets in. I placed the pan-tilt on top of the enclosure to use the height and stabilize it with the weight of the components. To make it removable for maintenance, I glued the motors to a small plastic plate and attached the plate to the enclosure with Velcro.
Final Result
In short: it works. Since setting it up, pigeons have kept their distance and the balcony finally stays quiet.
The next blog post will cover the software side of the Bird Sentry robot. Stay tuned!